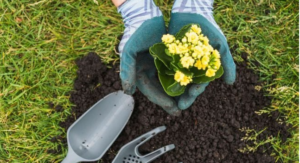
Grow your garden to new heights and help save the world with homemade compost.
Composting is great for your garden and the environment. Instead of dumping vegetable scraps, coffee grounds, grass clippings, and fallen leaves in the trash, you can recycle them into a useful soil amendment. Recycling organic matter at home keeps tons of food waste and yard debris from going to the landfill each year.
If you’re already on the compost-making bandwagon—or even if you’re a novice gardener—we’ve got some great ideas to share on how you can use all that black gold you’ve created.
1. Compost efficiently and consistently for fast results.The more consistently you maintain the right conditions, the faster the composting happens. How fast the pile breaks down depends on several factors: particle size, carbon to nitrogen ratio, temperature, moisture, and aeration.
In the most efficient composting systems, it can take as little as three weeks to turn out a batch of finished compost. In a passively managed compost pile, where the material is simply piled and left alone, it may take a year or longer to complete the process.
2. Look for these telltale signs to know when compost is ready.
An observant gardener will look for clues to know when compost is ready to use. The pile will shrink to half its original size, and the materials will be unrecognizable. As microbes consume ingredients in the pile and convert raw ingredients to compost, they generate heat. The interior of the pile becomes warm to the touch and gives off steam. When the compost is ready, it stops building up heat. Finally, the finished compost is dark and crumbly with a pleasant and earthy aroma.
Composting microbes consume nitrogen as they work through the pile. If they’re not finished and you turn them into the soil, the microbes compete with plants for all available nitrogen. This will stress your plants and counteract the positive effect that the finished compost could have had. Avoid the temptation to use unfinished compost.
3. Screen your compost. When it’s finished, there will still be a few large particles left behind that you won’t want to mix into your garden bed. You can filter out these sticks and stones to make a nice, smooth product suitable for using indoors or out. You can buy a compost sifter (available on Amazon) or make one with a few pieces of scrap lumber and some ¼-inch hardware cloth.
It’s important to remember compost is a soil amendment, not a soil replacement. On its own, it holds too much water and provides no real structure. Few plants thrive in that environment. Compost is most effective either incorporated into the soil or applied at the soil surface.
4. Make a potting mix. Screened compost makes excellent potting soil for your container plants. Use 1-part compost and 3-parts perlite or vermiculite by volume. Compost alone holds too much moisture. Perlite or vermiculite will balance out the water retention properties.
5. Incorporate compost into garden beds in early spring or fall.
At planting time, mix 1 to 2 inches of compost into your garden beds. Compost enriches the soil structure and nutrient retention ability of both sandy soil and clay soil. Additionally, it improves root development, drought tolerance, and disease resistance in garden plants.
6. Mix compost with native soil when you plant trees, shrubs, and perennials.When it comes to gardening goals, using compost with your soil is always a helpful step. When planting a tree or shrub, make a uniform mixture of compost and soil from the planting hole. This combination creates a transitional growing environment where roots can easily expand from the potting mix, while also flourishing into the local soil.


